Deploying Traefik v3 Reverse Proxy With Cloudflare DNS & Docker on AlmaLinux 10
A Complete Step-by-Step Guide with Cloudlfrare
This guide walks through deploying Traefik v3 as a secure reverse proxy on AlmaLinux 10, using Cloudflare DNS-01 challenge for automatic HTTPS certificates. The setup includes preparing the server, configuring Traefik’s static and dynamic configuration files, enabling Cloudflare DNS validation, and getting Traefik running behind Docker.
1. Prepare Your Server Directory Structure
Create the Traefik working directory and configuration folders:
mkdir -p /root/traefik/data
cd /root/traefik/data
touch traefik.yml config.yml acme.json
chmod 600 acme.json
Your final structure will look like:
/root/traefik
├── docker-compose.yml
└── data
    ├── traefik.yml
    ├── config.yml
    └── acme.json
2. Create a Cloudflare API Token
Traefik uses the Cloudflare DNS-01 challenge to generate HTTPS certificates automatically.
In Cloudflare:
- Go to My Profile → API Tokens
- Click Create Token
- Choose template “Edit zone DNS”
- Permissions required:
- Zone → DNS → Edit
- Zone → Zone → Read
- Select your zone (domain)
- Leave IP filtering empty
- Save your API token
This token will later be added to Docker Compose.
3. Create Traefik Static Configuration (traefik.yml)
This file defines:
- Dashboard
- EntryPoints (80/443)
- Providers (Docker + File)
- Cloudflare ACME resolver
Example:
api:
  dashboard: true
  debug: true

entryPoints:
  http:
    address: ":80"
    http:
      redirections:
        entryPoint:
          to: https
          scheme: https

  https:
    address: ":443"

providers:
  docker:
    endpoint: "unix:///var/run/docker.sock"
    exposedByDefault: false

  file:
    filename: /config.yml
    watch: true

certificatesResolvers:
  cloudflare:
    acme:
      email: [email protected]
      storage: /acme.json
      dnsChallenge:
        provider: cloudflare
        resolvers:
          - "1.1.1.1:53"
          - "1.0.0.1:53"
4. Create Traefik Dynamic Configuration (config.yml)
Here you define:
- Dashboard router
- Authentication middleware
- Security headers
Example:
http:
  routers:
    traefik-secure:
      rule: "Host(`traefik.yourdomain.com`)"
      entryPoints:
        - https
      service: api@internal
      tls:
        certResolver: cloudflare
      middlewares:
        - default-headers
        - auth

  middlewares:
    auth:
      basicAuth:
        users:
          - "USER:HASHED_PASSWORD_HERE"

    default-headers:
      headers:
        frameDeny: true
        contentTypeNosniff: true
        browserXssFilter: true
        forceSTSHeader: true
        stsIncludeSubdomains: true
        stsPreload: true
        stsSeconds: 31536000
(Replace with your domain and hash.)
5. Create the Docker Network
docker network create proxy
This network allows Traefik to communicate with your other containers.
6. Generate a Basic Auth Password
Install the htpasswd tool:
dnf install -y httpd-tools
Generate password hash:
htpasswd -nb USER YOURPASSWORD | sed -e s/\\$/\\$\\$/g
Paste the generated hash into config.yml.
7. Create docker-compose.yml for Traefik
This file launches the Traefik container with access to:
- Ports 80/443
- Cloudflare DNS token
- Mounted config files
- Docker socket
- Routers and middleware definitions
Example:
services:
  traefik:
    image: traefik:latest
    container_name: traefik
    restart: unless-stopped

    command:
      - "--configFile=/traefik.yml"

    networks:
      - proxy

    ports:
      - "80:80"
      - "443:443"

    environment:
      - CF_DNS_API_TOKEN=YOUR_CLOUDFLARE_API_TOKEN

    volumes:
      - /etc/localtime:/etc/localtime:ro
      - /var/run/docker.sock:/var/run/docker.sock:ro
      - /root/traefik/data/traefik.yml:/traefik.yml:ro
      - /root/traefik/data/acme.json:/acme.json
      - /root/traefik/data/config.yml:/config.yml:ro

    labels:
      - "traefik.enable=true"
      - "traefik.http.routers.traefik.entrypoints=http"
      - "traefik.http.routers.traefik.rule=Host(`traefik.yourdomain.com`)"
      - "traefik.http.middlewares.redirect-to-https.redirectscheme.scheme=https"
      - "traefik.http.routers.traefik.middlewares=redirect-to-https"
      - "traefik.http.routers.traefik-secure.entrypoints=https"
      - "traefik.http.routers.traefik-secure.rule=Host(`traefik.yourdomain.com`)"
      - "traefik.http.routers.traefik-secure.tls=true"
      - "traefik.http.routers.traefik-secure.tls.certresolver=cloudflare"
      - "traefik.http.routers.traefik-secure.service=api@internal"

networks:
  proxy:
    external: true
8. Start Traefik
cd /root/traefik
docker compose up -d
Traefik will:
- Start reverse proxy engine
- Load static & dynamic configs
- Connect to Docker
- Request HTTPS certificates automatically from Let’s Encrypt via Cloudflare
9. Create DNS Records in Cloudflare
Add an A record:
| Type | Name | Value | Proxy |
|---|---|---|---|
| A | traefik | YOUR_SERVER_IP | DNS Only (Gray Cloud) |
| A | service | YOUR_SERVER_IP | DNS Only |
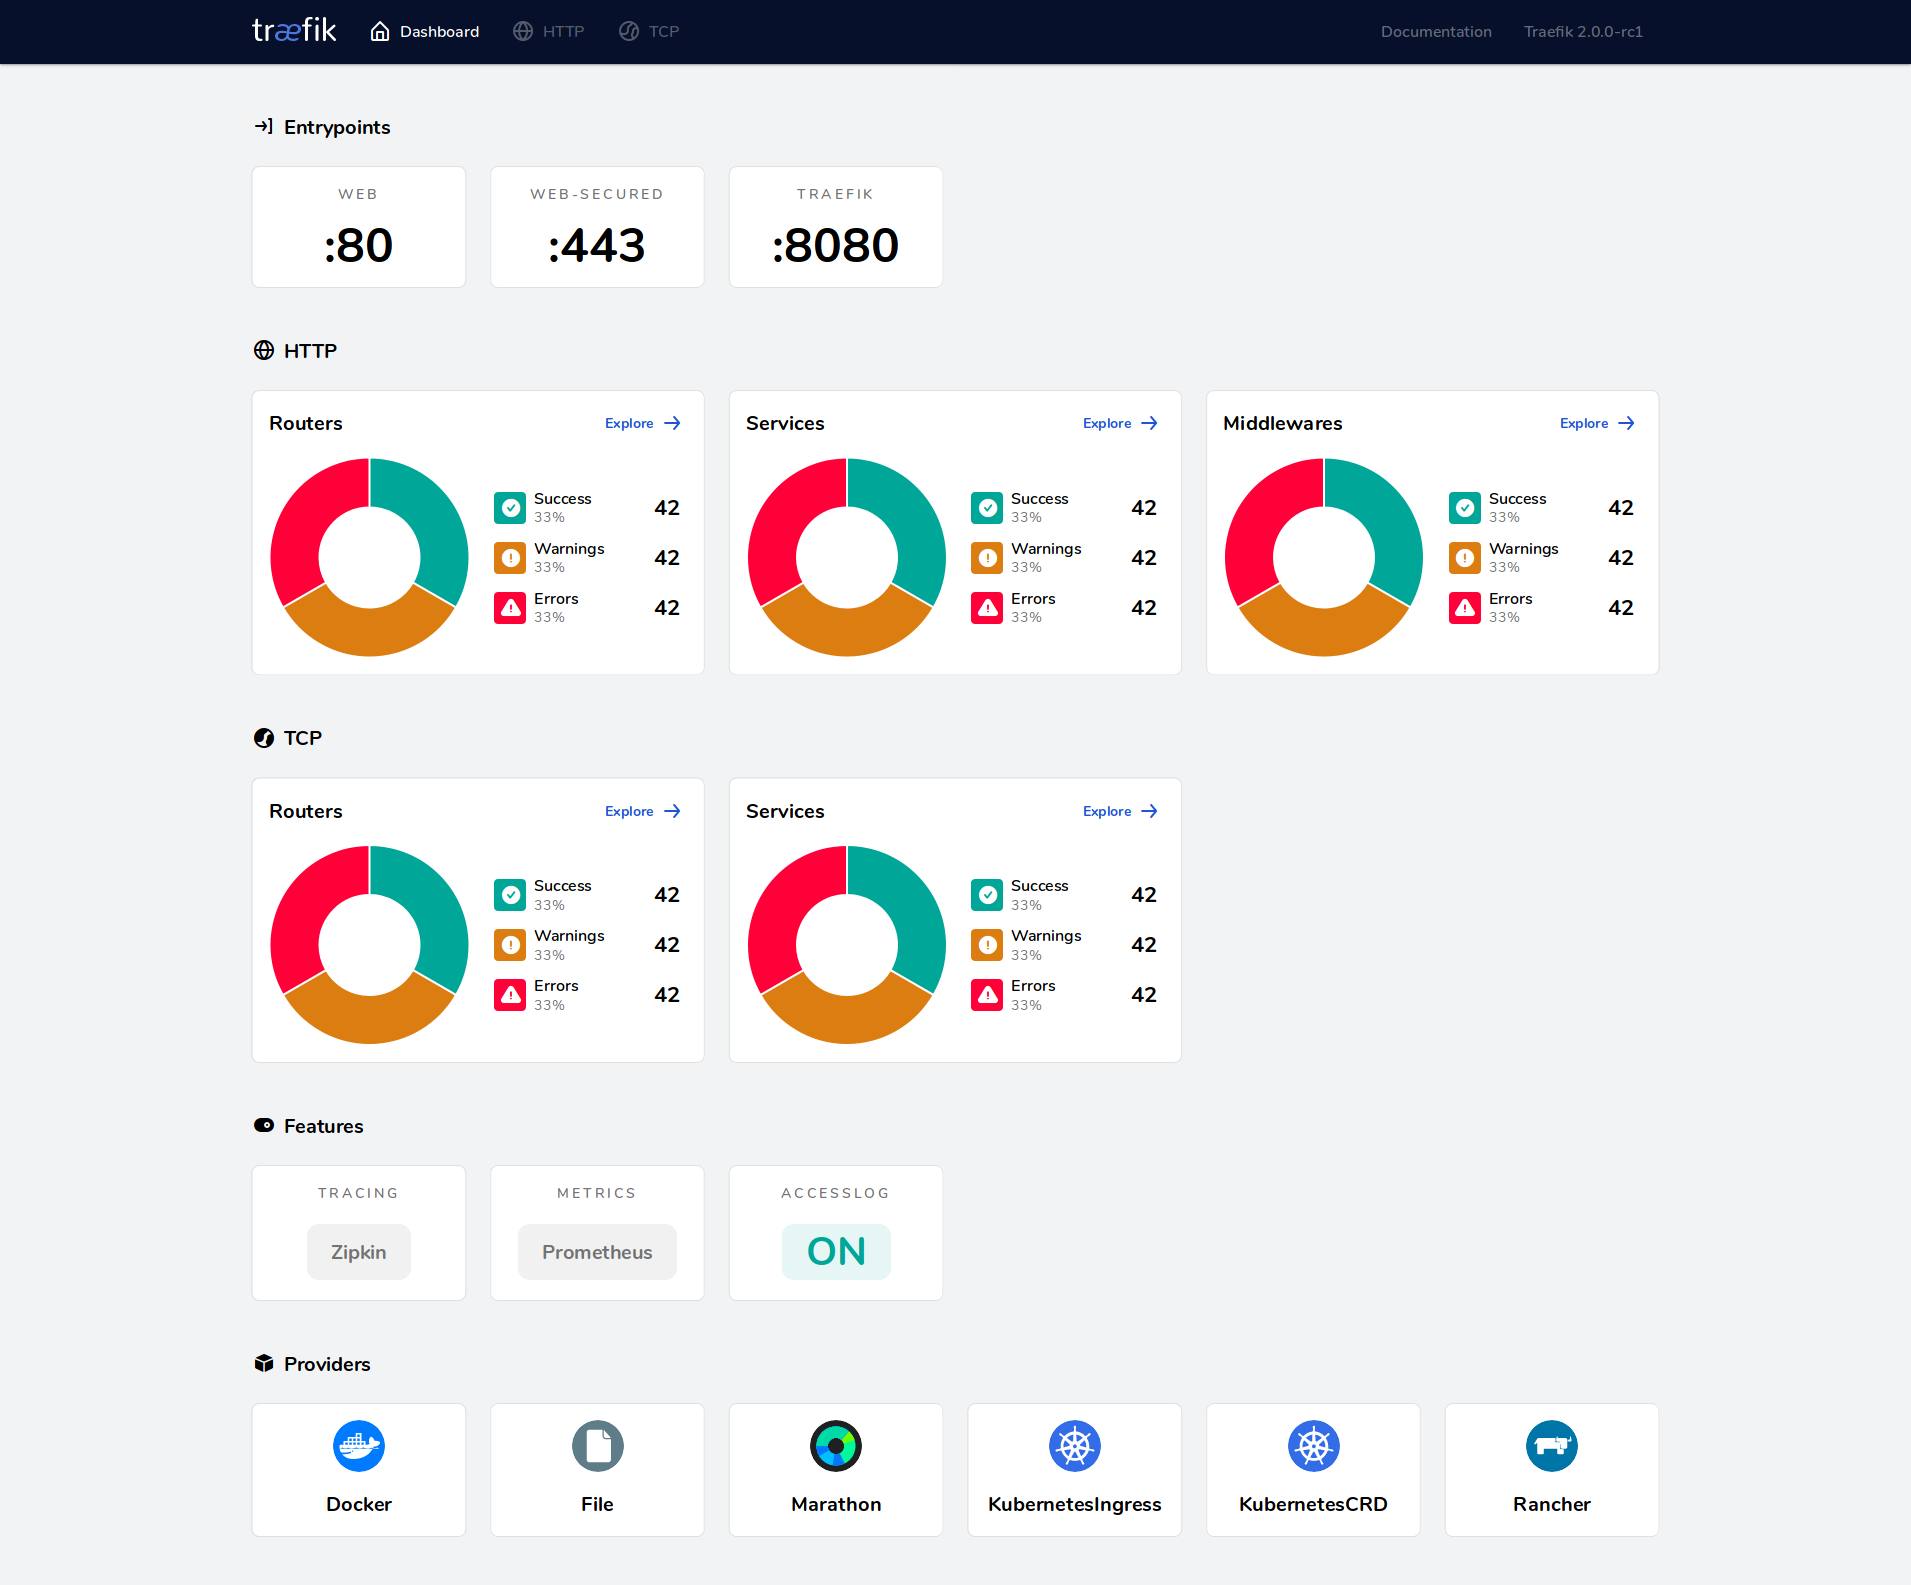
10. Access the Traefik Dashboard
Visit:
https://traefik.yourdomain.com
You will see:
- Valid Let’s Encrypt SSL certificate
- Basic authentication prompt
- Traefik dashboard
Traefik is now fully operational as a secure reverse proxy.
🎉 Conclusion
You have successfully:
✔ Deployed Traefik v3 on AlmaLinux
✔ Configured Docker networking
✔ Enabled Cloudflare DNS-01 challenge
✔ Installed full HTTPS with automatic certificate renewal
✔ Added Basic Auth protection
✔ Prepared the system for additional apps (Portainer, Proxmox, n8n, etc.)
This is a production-grade, secure Traefik reverse proxy stack ready for your entire infrastructure.